

 "
"Our house is about to turn 100 years old. Original molding, arched entryways, a butler door, and even some original light fixtures were a selling point when we purchased our home nearly six years ago. But with its age, we knew it would inevitably need maintenance and updates.

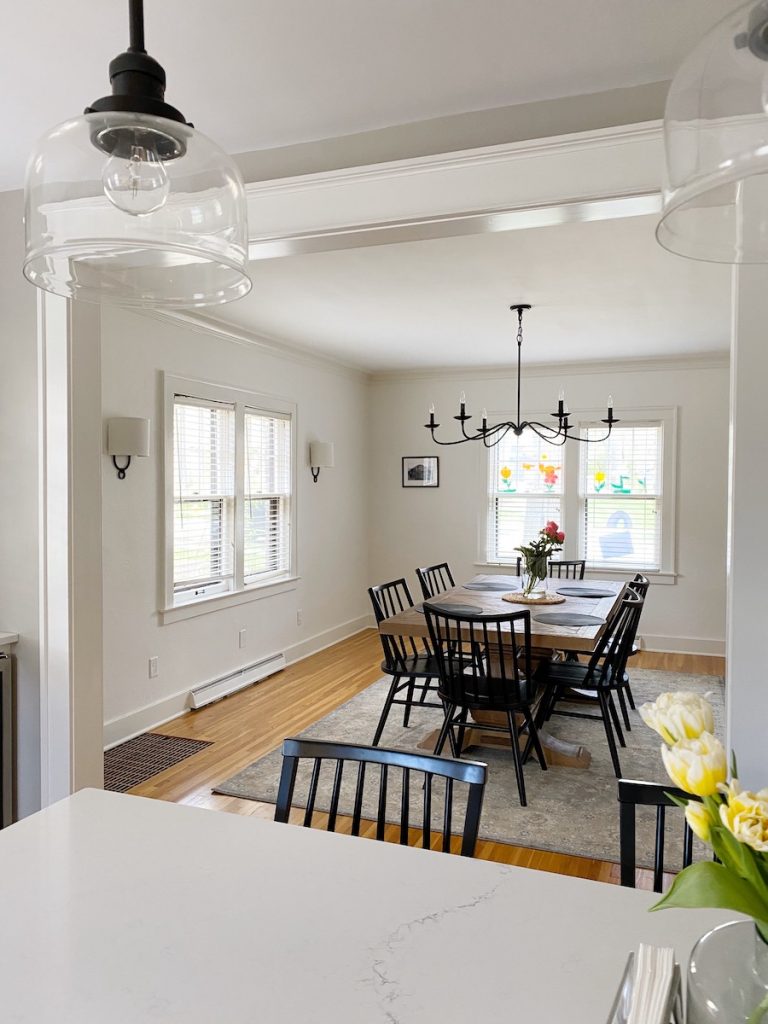
Despite the character charm, we learned our life doesn’t require details like a butler door between the kitchen and dining room. In fact, it’s more of a hazard with young kids (hello pinched fingers!). Our formal dining room was used for holidays one to three times per year. The other 362 days it turned into junk collection and a shipping and receiving station from Amazon. We knew we were losing out on some valuable living space, so we made a budget and a plan to remodel our kitchen.
From design to completion, the project took five months, with the main demo and construction happening from late December through early March. We anticipated unforeseen challenges with our old house but were happy to have a (mostly) smooth process, and we were lucky to finish our project only one week behind schedule. Here are a few lessons learned throughout the process.
1. Note Pain Points in Your Existing Space
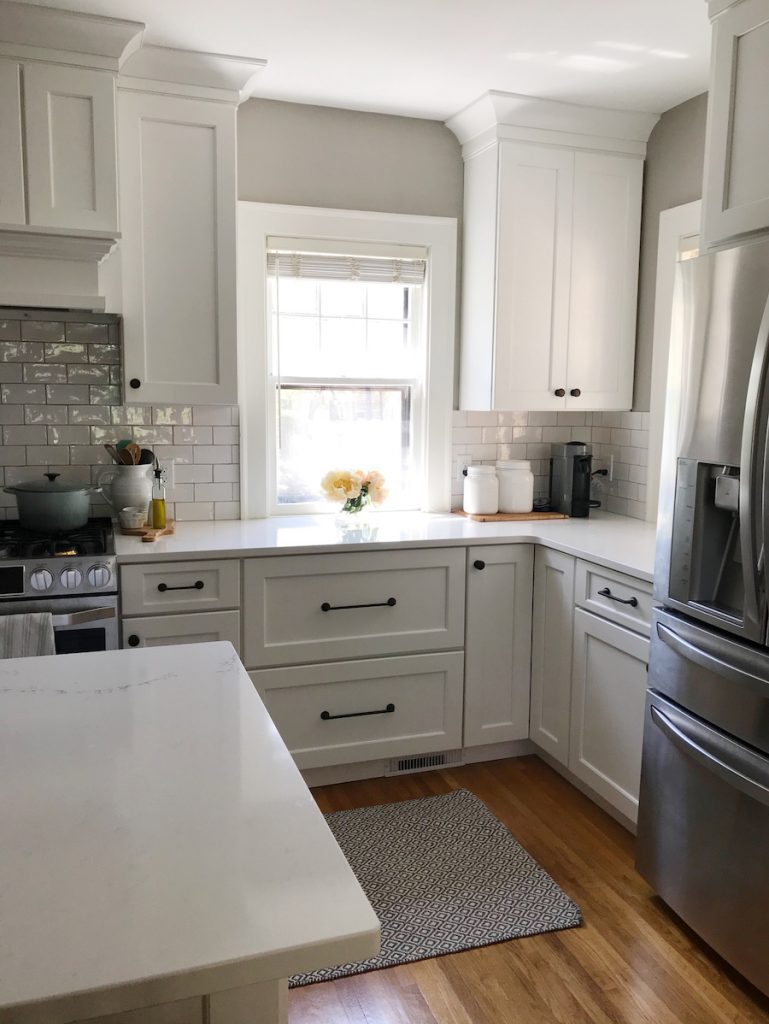
Pay attention to issues in your existing space. For us, my husband and I were always running into each other when trying to make meals or empty the dishwasher. Our galleys were too narrow and our fridge was always blocking a walkway when opened, not to mention obstructing the view from our front hall. Additionally, we needed more countertop space for meal prep, additional storage to eliminate the snack basket on top of our fridge, and room for the kitchen appliances we stored in the basement.
On a friend’s recommendation, we also opted for mostly drawers below our countertops versus cupboards, which has been life-changing for organizing plastic storage, pots, pans, and snacks the kids can now reach themselves.
Before


After


2. Start Researching Big Ticket Items Early and In-Person (If You Can)
I still remember registering for wedding gifts at Crate & Barrel when the sales staff recommended picking up the plates and silverware to make sure we liked the feel of them in our hands. With so many online options, it can be tempting to do it all virtually. But sometimes you need to test how things the feel in your hands or bring samples home—like trying a hardware knob on your existing cupboard or seeing how tile looks in your room’s natural light.
Do these trips without the kids, if you’re able. Trying to talk to a salesperson in between sternly talking to two children running amuck in a showroom is quite challenging. Once you find what you like, you can watch out for sales and specials. We were able to buy all of our appliances with significant Black Friday savings.
Before

After

3. Let the Social Media Algorithms Do Their Work
If you’re considering a project, start saving style, furniture, fixture, and other inspiration now. My Instagram and Pinterest feed started showing me new ideas and new brands I’d never considered. My two favorite finds were Poly & Bark, where I ultimately purchased my dining room chairs, and Samplize, which sells self-adhesive real paint samples.

4. A Kitchen Designer Can Be Like a Project Doula
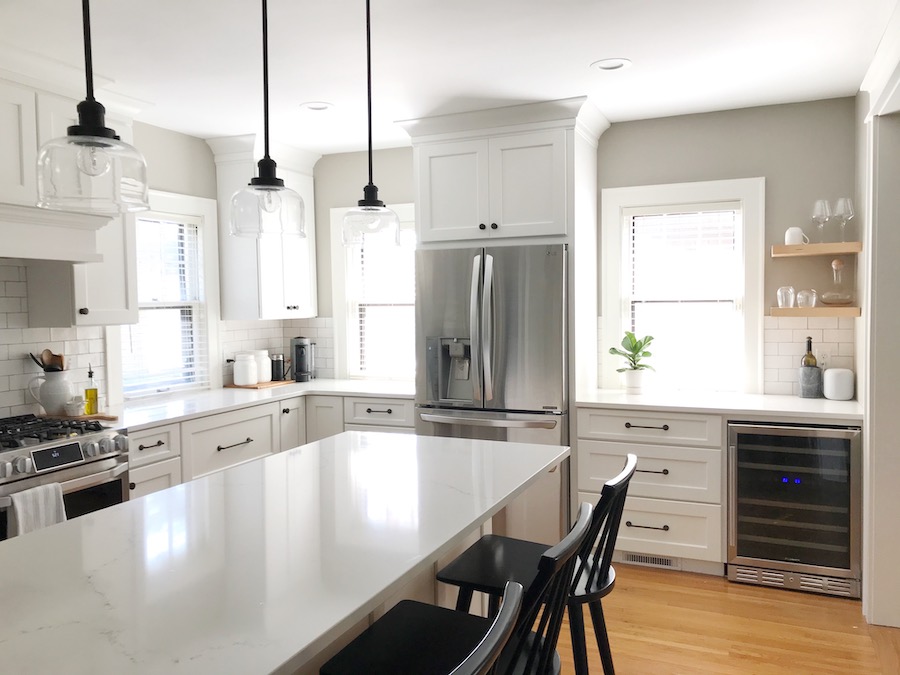
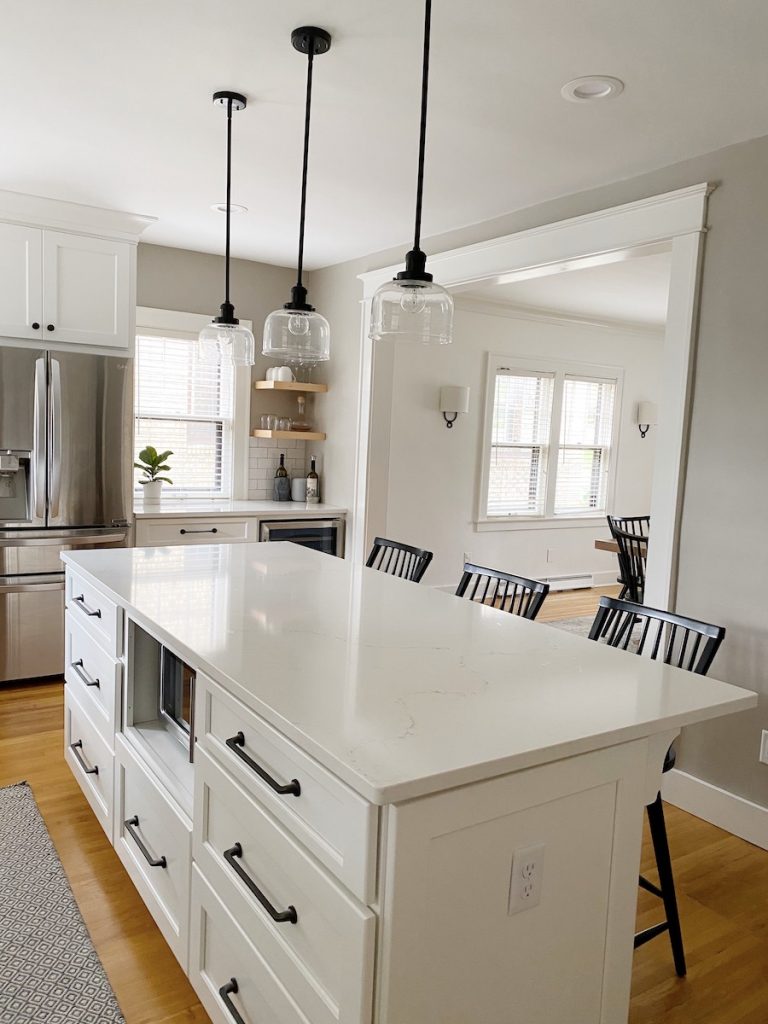
Most cabinet vendors offer free design services, but since we were knocking down a wall and changing our kitchen footprint, we wanted to hire a professional designer to help us map out the most functional use of the space. We shared design inspiration and a rough budget with our designer Kerra, co-owner of Times Two Design Company, who came back with two concepts. Our final kitchen design was a blend of both. She made sure our priorities were included—like a large island for my two girls to enjoy morning breakfasts (little did I know it’d become my home office first) and my husband’s one request for a wine fridge.
Additionally, she met with our contractor to discuss structural needs and our cabinet vendor the flesh out details like crown molding, countertop edges, and other details I wouldn’t have known to ask about. Kerra also accompanied me on a shopping trip where we picked out plumbing fixtures, tile, grout, and hardware. Without her narrowing down the options, I think I would’ve been overwhelmed with choices.
Before

After


5. Get Out During Demo If You Can
We were able to align an out of town trip with our demolition week. When we returned, our house was a dust mess and the kitchen was completely torn up. I think it would’ve been extremely stressful to have been living there with two young kids and a dog.
One practical lesson we learned was to change our air filter every week during the construction. We thought our furnace or thermostat was broken because our house wouldn’t heat up past 58 degrees, only to realize our air filter was completely full of sawdust.
Before


After
6. You Can Get By With a Lot Less
We set up a temporary kitchen in the kids’ playroom with a microwave, hot plate, and air fryer. It was a cozy nook where we cooked and ate our meals for two months (one-pot meals were my go-to).
We also did a double purge of kitchen items we didn’t use or need; the first when we cleared out the existing kitchen and the second when we moved back in. It’s refreshing to even have some empty shelves and drawers to grow into.

7. It’s Still a Work in Progress
We were so fortunate to finish our project two weeks before our state’s shelter-in-place order. So, we’re still on the hunt for some artwork, window treatments, a dining room sideboard, and I’d love to refinish the floors darker at some point. But I’ve always liked Nate Berkus’s decorating philosophy that your home should feel like a collection over time. So, we aren’t in a rush. Right now, we’re just grateful we’re no longer eating meals off the hot plate in the playroom.
This article was originally published on May 27, 2020 and has been updated for timeliness.
